
No Spinning? No Morphing? Your browser does not support WebGL. Find out more.
Share on Facebook
Follow @vvvv_jsTweet
This guide will give an introduction to the key principles of working with VVVV.js, and will make you comfortable with the patch editor. After reading this guide, you will understand how the VVVV.js runtime parts and the patch editor work together, and basically know your way around the patch editor. You don't need anything but a Chrome web browser to work this guide.
The basic thing to understand about VVVV.js is how developing and running VVVV.js plays together. There are these 3 compononents:
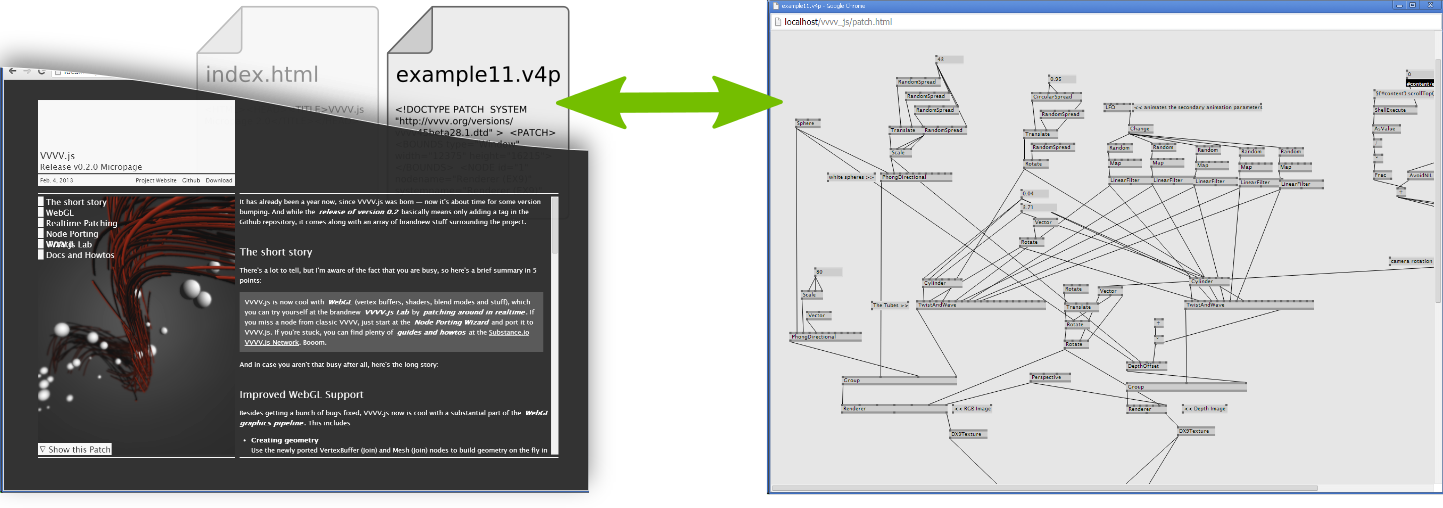
What differs VVVV.js from similar projects is the fact that it does not start with launching an empty editor, which subsequently creates patches. Instead, it starts with a website running an (initially empty) patch, where you can plug the patch editor in. So, to emphasize this:
A VVVV.js patch can not run without a containing website. Also, the patch editor can not exist without a patch, it can only be launched on top of an already running patch
This is essential, because this way, there is no difference between development mode and runtime mode. Your changes to the patch will be reflected immediatly in the final environment — no exporting, no compiling, no refreshing.
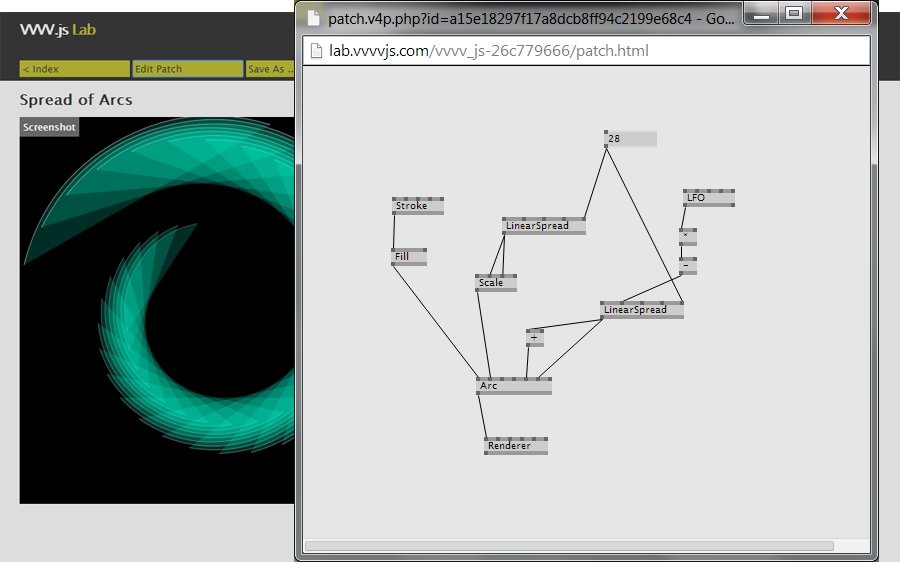
Let's forget about how to include and load VVVV.js for a moment, and just get some idea of how patching itself works. The best place to start is the VVVV.js Lab, where we can launch the editor on any of the posted patches, and play around with them. So let's head to http://lab.vvvvjs.com/show.php?id=a15e18297f17a8dcb8ff94c2199e68c4 and click the Edit Patch button. This should open the patch editor in a new window. If not, check your browser's popup blocker.
Now you can make changes to the patch, and see the results on the website immediatly. Have a look at the VVVV.js Cheat Sheet for the basic patching operations. The figure below gives some inspiration about what you can do with the patch.
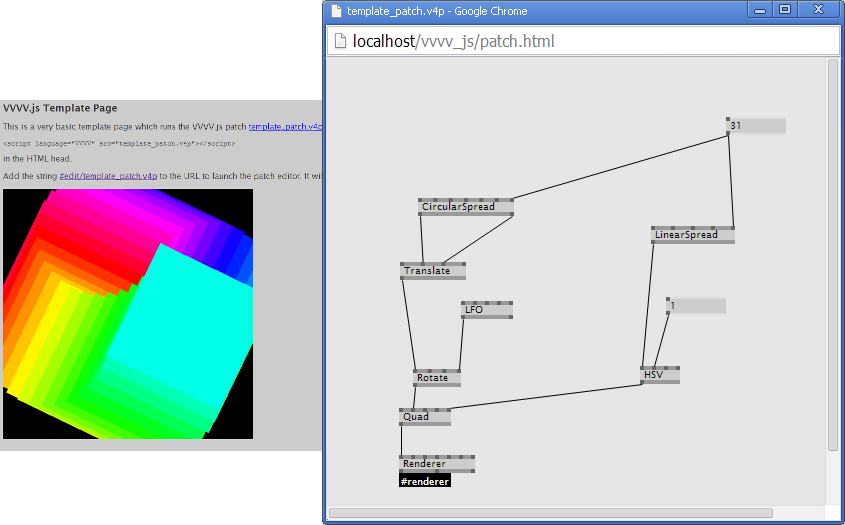
Of course, in a real-life scenario you usually don't want any "Edit Patch" and "Save Patch" buttons on your website. But that's ok, since we actually don't need them. Instead we are providing a special command to the URL in the address bar, so we can launch the editor without the need of any controls on the website. Open http://www.vvvvjs.com/vvvv_js/template/ and once it is loaded, view the page's source code (e.g. Right-Click -> View Source). You will find the line
This line tells you that the file template_patch.v4p has been loaded and is running. We are going to attach a patch editor to it by adding
#edit/template_patch.v4p to the URL in the address bar, like so:

#edit/[patch file name] to the URL in the address bar will launch the editor.
The patch editor should open in a new window. Again, check your popup settings for the page if it does not work. Make this simple rotating quad more interesting by adjusting the patch like this:
Subpatch nodes will not show up in the list of nodes, as VVVV.js initially has no idea about any available subpatches. You have to
enter the complete relative filename of the subpatch and hit enter. Let's say the patch you are working on is
/patches/main.v4p, you can load the subpatch /patches/sub/subpatch.v4p like this:
"sub/subpatch.v4p", including the .v4p extensionTo add the subpatch /patches/other_subpatch.v4p (which is in the same directory as main.v4p), you have to enter
"./other_subpatch.v4p"
That's it, you learned how to launch the editor and made your first steps in patching VVVV.js. Now it's time to find out how to use VVVV.js in your own project, rather than just edit already deployed patches. Read all about it in the next guide, Embedding VVVV.js.
